Introduction
in this artical we discuss How to Crop a Shape in Figma. Effectively cropping shapes is a crucial design skill that every designer must possess. In this article, we will explore the step-by-step process of cropping a shape in Figma to uncover new design possibilities. In addition, we will discuss the most effective cropping strategies, as well as the benefits and drawbacks of cropping shapes in Figma. Finally, we’ll demonstrate some successful cropping projects from the actual world.
Section 1: Fundamentals of Understanding How to Crop a Shape in Figma
Let’s begin by familiarizing ourselves with the fundamentals of cropping in Figma. Cropping gives you precise control over the visual composition of your design by allowing you to trim or conceal portions of a shape. Cropping is necessary for creating clear and polished designs, whether you’re trimming an image or masking a layer. Additionally, you can create intriguing compositions by reducing elements to create unique shapes. In addition, cropping can be used to highlight specific elements or attract attention to particular portions of a design.
Section 2: Choosing the Cropable Shape
Prior to cropping a shape, we must first select the desired shape or layer. Selecting a shape in Figma is as simple as clicking on it in the canvas or selecting it from the layers interface. Once the shape has been selected, you can proceed to the next phase. You can crop a shape by selecting it and dragging the cursor to the desired edge. You can then click and drag again to modify the size of the shape. Finally, you can validate the crop by pressing enter.
Section 3: Crop Application
Now comes the exciting part: cropping the specified shape. In Figma, you can crop a shape using the “Mask” feature. Select the desired shape, then right-click it and select “Mask” from the context menu. After clicking the Mask option, a preview window will appear where you can modify the mask. You can also modify the mask’s opacity and even apply effects to it. Click “Save” when finished to implement the crop. This creates a mask layer that allows you to designate the shape’s visible area.
Section 4: Crop Adjustments
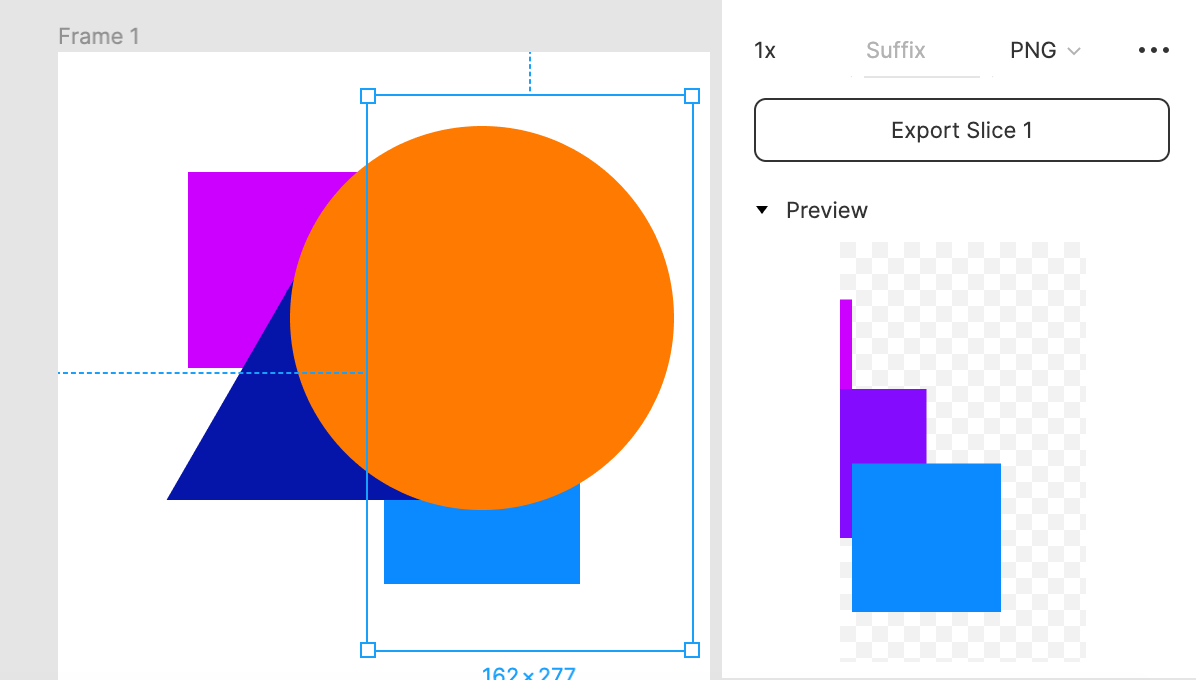
After applying the mask, you can modify the crop by modifying the mask layer. Figma offers multiple options for modifying the mask, including resizing, repositioning, and rotation. By experimenting with these options, you can achieve the haircut that best complements your body type. Utilize Figma’s intelligent cues and alignment tools to ensure accuracy when cropping an image. After adjusting the disguise, ensure that the desired result has been achieved by reviewing your work. Finally, ensure that the cropped shape is exported in the appropriate format for its intended use.
Section 5: Tuning and Modification
You can further fine-tune and refine your cropped shape to take it to the next level. Figma provides a variety of sophisticated features, such as feathering, opacity adjustments, and blending modes, that can be used to improve the overall appearance and feel of your cropped shape. Experiment with these alternatives to add visual depth and appeal to your design. Experiment with the various options to determine what works best. Use the shape tools to alter the size, position, and angle of your shape once you have the ideal shape. Add final accents of color or texture to give your design a unified appearance.
The conclusion is:
Mastering the art of cropping shapes in Figma expands the scope of your design projects immensely. By following the procedure indicated in this blog post, you will be able to confidently crop shapes with precision and originality. Remember to practice and experiment with various Figma techniques to become an expert. Experiment with various cropping techniques, including center slicing, slice slicing, and free-form cropping. You can always undo your errors and start over. Have fun with cropping shapes and find new methods to distinguish your designs.


